Monday, December 30, 2013

Specialty Card

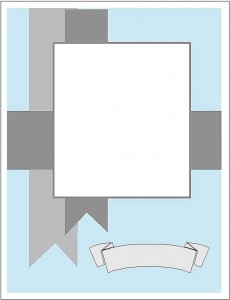
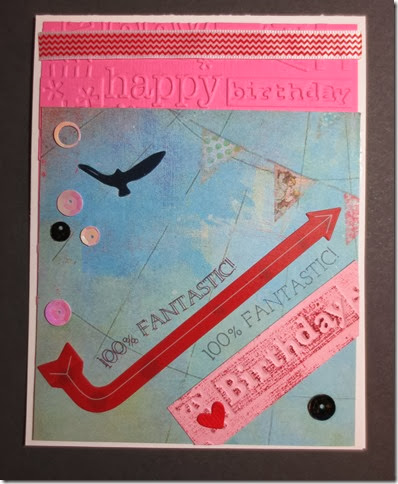
The MFT Wednesday card sketch was in my mind all week and this is what came out of my hands.  Thank you MFT.

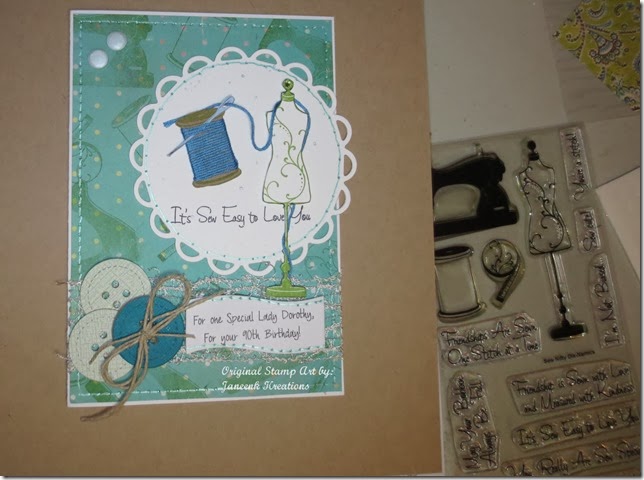
A friend asked if I could make a specialty card for a dear friend of hers who is having her 90th birthday.  Well….of course.  I had been eyeing up this stamp set from My Favorite Things and it went on 50% off sale and I knew it would be the perfect images for my friends request.   I could hardly wait to get it but since she was so kind as to give me an order for several more cards, I focused on getting them done as I waited for my MFT order.

A 90th birthday card for a very active lady had to be larger than the standard A2 card I usually make so I used 12x12 paper to create a 5 x 7 card.

My friend had a lot of input for this card so I can’t take all the credit.  She suggested background paper that had sewing things on it and buttons.   I don’t have any paper like that or buttons to match,  so I went ahead and made my own.  Using paper from Afternoon Amuse Glitz pack, I stamped the images all in olive green.  I laid the paper on the scor-buddy and made holes with the scor-bug.  Then using a metallic gel pen I “sewed’ the edges.  Using a large spellbinders die for the circle I left the die in place after cutting and used the inside of the die as a template to pierce holes around the circle.  Remove the die and “sew” again with the same gel pen. 

Next step, stamp the spool image onto chipboard and hand cut it.  Wrap it with embroidery thread.  I then stamped the dress form in olive green on thick cardstock and fussy cut it out.  I knew I would need a base across the bottom and I went digging for this gorgeous wire ribbon from Ribbon Carousel.  It has a bit of fine wire in it and wraps beautifully.  I cut the buttons out of Coredinations card stock and then cut chipboard backings for them. I took the one darker button and threaded twine through the holes and then made a great figure eight bow for it. 

The sentiment on the banner was requested by my friend and I thought the wavy banner gave movement to the card.  It looked a bit bare and I used the same technique as  the background paper for stitching it.  As I laid the pieces all out on the big doily it still looked bare and not tied together.  I made a needle, free hand and threaded it, wrapping it around the dress form and pushing the needle into the spool.  Ah that looks better.  then looking at the card, it seemed a bit weighted on the bottom and I added the two “Candies” in the top corner.  Hmm…still a bit bare looking.  The doily looks too stark white.  Using my favorite Judith stamp, the five dots, I dotted the white area with blue mettalic ink.  A small gem popped onto the top of the dress form and it’s all ready to put together.  You can’t tell from the picture but the dress form is popped up with dimensionals to give it some depth and make it the real focal point on the doily.

I love how this turned out.  I love being challenged to create different things.  I am so excited about how this turned out and I think my friend will find it is exactly what she was hoping for.  Thanks for looking.  All comments are like big hugs and much appreciated.  Red heartIMG_3331

I realized after I took the photo the stamp set was sitting right next to the card.  I left it for you to view rather than cropping it out. What a fun set.
Sunday, December 22, 2013

Use a stamp

That is surely a simple “Challenge”  Monday’s challenge @ Simon Says Stamp is that simple.  Join in.  It’s the last challenge for the year and you have a lot of time to upload still.   Here I am trying a technique I learned from Hero Arts.  I am using stamps from Mark’s Finest Papers and Gina K though as I have so few Hero Arts besides sentiments.  Thanks for letting me play anyway, Simon!

IMG_3256

Friday, December 20, 2013

Simon’s Bling challenge

I just love all the challenges Simon Says Stamp posts.  This one will run two full weeks so lots of time to join in on the fun.  BLING  IT ON besides the obvious  rhinestones I also glitzed up the little heart.  I do so love the mini heart die from Simon Says Stamp. IMG_3247…..here is my entry.

Thursday, December 19, 2013

MFT sketch challenge

The MFT Sketch 155 challenge looked a bit intimidating as I’ve never been able to make those hills and valleys look very nice; but let’s just jump right in.  I have been playing with MFT Blueprints all day anyway.  This card took about ten minutes to make.  It uses Tim Holtz images.  I sprayed the stamps with water after inking them up with Distress Inks and stamped them onto a piece of Coredinations linen look cardstock. MFTWSC155 It will be a GoTo sketch for me from now on.  Open-mouthed smile    IMG_3253
Monday, December 16, 2013

My Favorite Things Challenge 154

The sketch challenge at MFT had me intrigued since I don’t own the Blue Print dies from that sketch.  Hmmm…how to fix that.  Here’s the sketch and also my take on it.  Always love the way the sketches make me stretch.  The star is from BluePrints 4

IMG_3238

Altered Note Book for Simon Says Stamp

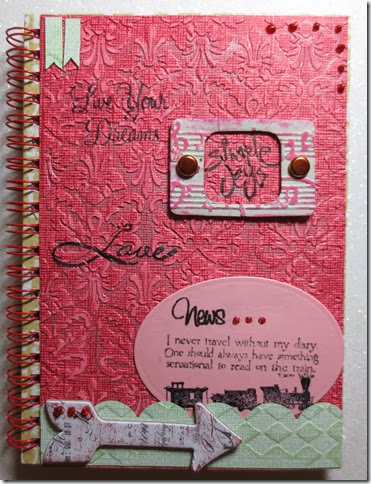
Simon’s last challenge for the year is to use a stamp.  Well that’s fun.  Here is an altered notebook that I have made for my niece.  It was in the $1.00 bin at Michaels and had boring colors on it and Christmas words.  To make it work for her for a trip she is taking in January, I made it in pink which is one of her favorite colors.  She had commented on a little notebook that I made for HYCCT and I wanted to remember to make one for her.  I first covered the notebook with some coredinations cardstock that I embossed and sanded.  Then STAMPED on it. The arrow is a Heidi Swapp embellishment and the other elements are homemade.  Using Mark’s Finest Paper sentiment and train and then My Favorite Things oval and the scallop border from Blueprints 4 I love the way it turned out.  The chip board is embossed and then swiped with a gelato.  Can’t wait to get it in the mail tomorrow for her Friday birthday. IMG_3236

Saturday, December 14, 2013

Christmas papers at MFP

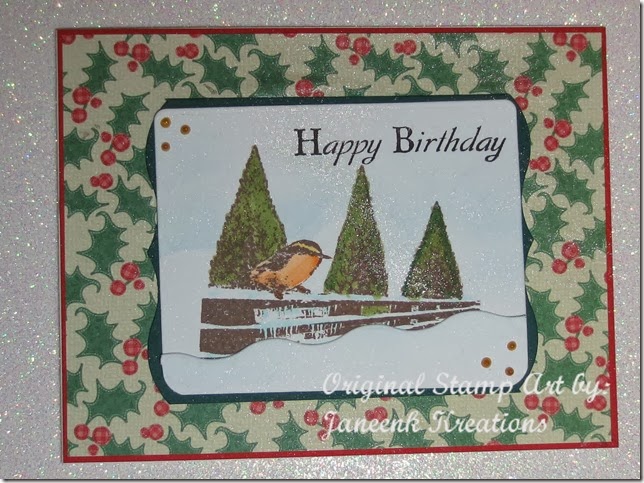
Mark’s Finest Papers Challenge 190 is to use three different Christmas Papers.  I had fun with this one and used The Peaceful Nuthatch set. I used red, green and the holly paper. IMG_3231

Simon threw me a challenge

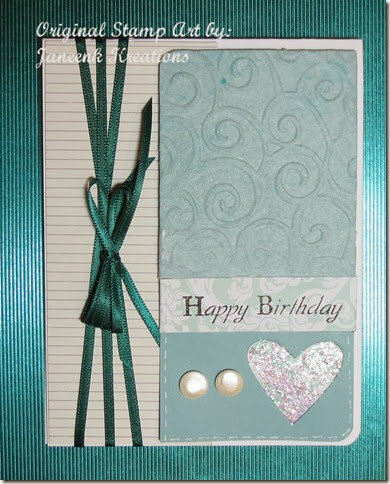
Do you need a tissue?  Simon Says Monday challenge was to use tissue paper.  oh dear, that is something I have never tried.  All the samples they showed were waaaaaay to complicated for me.  I thought about this all week and finally put something together this evening.  It’s simple but it’s tissue.  I wanted to make a special card for a  special young friend and thought the tissue would be pretty.

After embossing the tag portion of the card; I took some tissue paper and ran it through the same embossing folder.  then used my glue pad to put glue all over the embossed portion of the tag.  I lined up the pattern with the tissue paper and then folded it all behind.  I then took Smooch spray and sprayed the tissue paper to give it an even softer look and take away the white white of it.   I learned a new technique and had a bit of fun doing it.  I really like the way this turned out.  Something else new was to punch the heart and then line the back with the same paper as the band going across.  Then I filled in the entire heart with stickles.  I love the sparkle.  My new favorite embellishment are the Candi’s buttons.  Just the right touch.  Thanks for stopping by.

IMG_3230

Thursday, December 12, 2013

Simon’s SnowFlakes

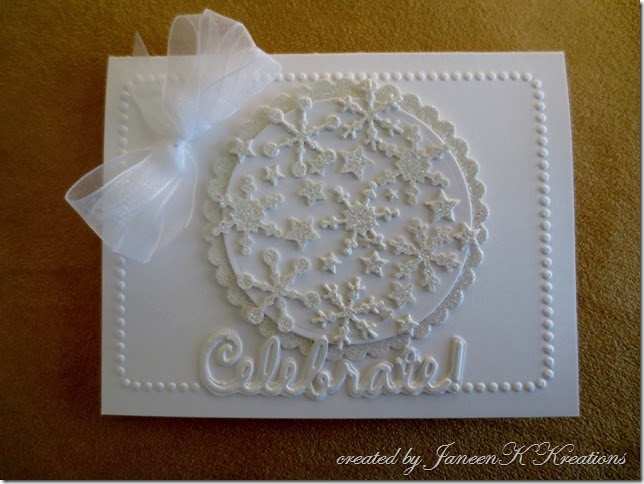
They asked for snowflakes.  I am so pleased with how this turned out.  I might just go and make another one.  White on white is so very elegant.  The only snowflake die I have is a little sizzlet one that I got years ago but I love it and it’s still effective.  I do have a couple of snowflake dies on my wish list though.  Just so my viewers aren’t bored.  Open-mouthed smile   I used an embossing folder by the Paper Studio.  When I placed the globe on the card it covered up part of the Celebrate letters.  I embossed the word only on a scrap of 80lb. weight cardstock and fussy cut it and used crystal effects sparingly and then layered it over the already embossed word.  It worked great.

Happy wonderful Holiday time to you all.  WIshing you Peace.   Thank you Simon Says for all your challenges and inspiration.  This one is for your Wednesday Snowflake challenge.

IMG_3180 (1024x768)

Tuesday, December 10, 2013

Sometimes you just have to be creative

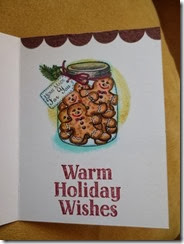
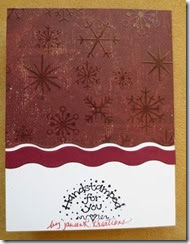
IMG_3164 (600x800)IMG_3166 (600x800)IMG_3167Sometimes ideas progress.  Like this one.  I wanted the gingerbread jar on the inside of the card.  I cut the circle hole in the front and then penciled around it onto the inside giving me a guide to place the stamped image.  Then the fun part, I colored it in with copics.  When I looked at the result it looked kind of boring and I decided to add the beautifully embossed designer paper but now I have to make the circle hole match up perfectly to the one already on the card base.  It’s more challenging than you think.  Well I got it close but not perfect…hmmmm…okay, I will color around the white portion with a brown marker.  Yep, that works and gives some depth too.  Cool, I like that look now.  But it needs a bit of color.  Rummage, rummage, yep, here’s some ribbons that will work well.  But then that stinkin’ bow would NOT adhere to the ribbon below it.  I finally used crystal effects, put a book on it and let it sit all night.  It sticks NOW!  Then, looking at my card inside, I see a black smudge of ink up top.  I tried to white it out but that looked kind of crummy.  Plan B.  Punch some small circle dies and cut them in half, make a scalloped border up top.  Hey, I like that look.  Cute, eh?   Then I turned my card over and, oh no, all the coloring from the gingerbread men have bled through.  Rats….what is Plan B now?  Cover it up with a scrap of that same designer paper and now it looks like I just covered something up.  Aha..a strip of coordinating scrap, cut with the same die, makes it match the frosting look on the gingerbread men.  Voila’ –a masterpiece.  We never know what we are going to end up with. 

Friday, December 6, 2013

Gelli Plate fun

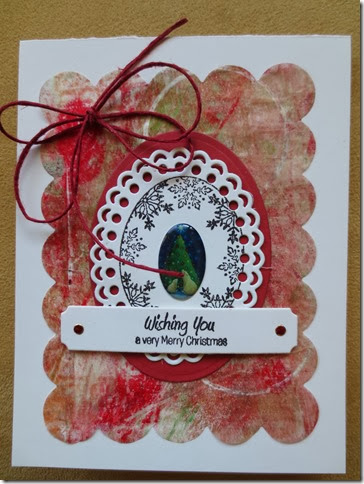
At the vendor show I went to last month, one of the vendors was showing the Gelli Plate.  I had heard of this tool but had NO idea what it was.  Well, what fun to spray, dab, and smear onto a squishy cushion and make our own back ground papers.  Here’s a piece of one of the works of art I did on deli paper. You know, that stuff that they wrap around your sandwiches in a deli.   It makes a wonderful background for holiday greetings.  Simon Says Stamp is challenging us to use a home made background and they are featuring the Gelli Plate this week on the Wednesday challenge blog, perfect entry for this challenge.  I used a sentiment strip die from MFT for the greeting and the Prickley Pear scalloped oval.  All stamped images are Prickley Pear.

IMG_3139

Tuesday, December 3, 2013

Wedding Wishes

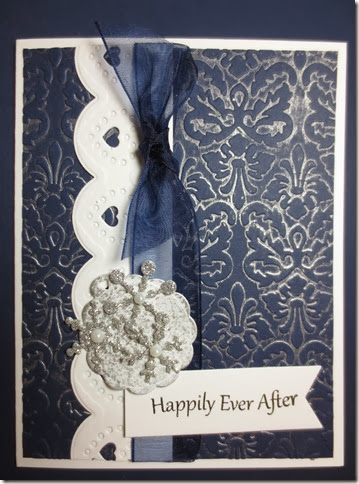
My cousin is getting married.  She sounds as surprised as can be.  She has been with this guy for quite a while and he proposed.  She has grown children already and a previous marriage and we are very happy for her.  They got engaged two weeks ago and the wedding is Friday.  I made this gorgeous winter card for her and new hubby.  Using Simon Says Tilted Banner Sayings stamps.  I get a lot of mileage out of these.  Use them often.  I am entering this in the anything goes challenge at Simon’s Blog.  I used Viva Pearl pen to make the pearls.

IMG_3130

Anatomy of a card

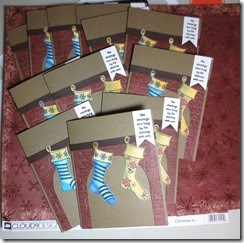
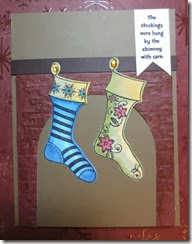
This was a great card to make.  First off, a disclaimer.  I did NOT come up with the idea for this creation.  I went to a Holiday Card Making class with Heidi from The Stamp Shoppe last month and we created one very similar to this.  It was so much fun I knew I wanted to make a bunch of this one.  But ….it looks simple, however there are many many steps to this. I made a dozen. I will enter this into the Use a Flourish at Simon Says.  The flourish is the red stamp.  I am using small pics for this post.  If you click on the pictures you can bring them up closer.

IMG_3122  IMG_3123  IMG_3125

Step 1.  Cut and score the card stock

Step 2.  Cut 4 x 4 pieces of brown decorative paper

Step 3.  Run those pieces through the cuttlebug with the Brick Embossing Folder

Step 4.  Run a distress ink pad over the brick texture to give it more realism

Step 5.  Using the Prickley Pear Dies cut out 24 pieces of Stockings

Step 6.  Cut out 12 small white pieces for tags

Step 7.  Using MFT die from Blue Prints 3 cut the fire place piece out

Step 8.  Cut 12 strips of brown for the mantle

Step 9.  Texture the mantle pieces all at once with a screen texture stamp

Step 10.  Glue the fire place on the card base

Step 11.  Glue the mantle down

Step 12.  Stamp each stocking with the patterned image from Prickley Pear

Step 13.  Color the 24 stockings (that took me an hour and half) but I love to color so it was fun

Step 14.  Attach the stockings to the mantle.

Step 15.  Add Viva Pearl pen as the little nails to hold the stockings

Step 16.  Stamp the little tags

Step 17. Cut a V shape into the tags

Step 18.  Glue the tag on

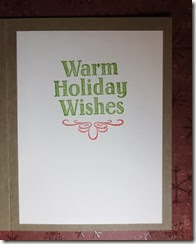
Step 19.  Glue in the sentiment panel inside

Step 20.  Stamp the Sentiment in Green

Step. 21. Stamp the Flourish from The Cat’s Pajamas “at your service set”

Step 22.  Stamp the back with my Handmade for you stamp and hand sign them in gold.  Smile (but of course)

That’s it!  I did them in several steps so I didn’t feel overwhelmed when starting them.  I had all the pieces cut out last night and then did the rest this afternoon.  My reward to me for shoveling the drive way and the deck.  Smile  go me!

Friday, November 29, 2013

My Favorite Things Sketch

I always enjoy the challenge of MFT sketch challenge.  Here is my interpretation for his week. MFTWSC152  The dots are from Blueprints 5, the Scallops are from Blue Print 4, the main image is cut with Blueprints 5.  I used Crystal Effects on the dots die cuts to make them raised and shiny like enamel dots. Laid down a bit of washi tape for interest and then covered with a pretty ribbon from my stash (Goodwill .99 for a very big spool of it)  I do so enjoy my Blueprints dies. I spritzed the flourish with Smooch and it’s got a nice glittery sheen to it that doesn’t show on the photo.  Then I die cut, stamped, colored and tucked a little bow from Prickley Pear onto the La La Land digi image.  Kitties and little girls just grab your heart, don’t they?

IMG_3117

Saturday, November 23, 2013

Saturday Stamping

It was fun to have some time in the stamping room today.  Listening to soft music and guns going off as the deer hunters hit the woods.  It was very very cold and I was glad to be in a nice warm house.  Here are today’s creations.  --I wanted to use some of my new Prickley Pear stamps.  They are so cute and fun to work with. 

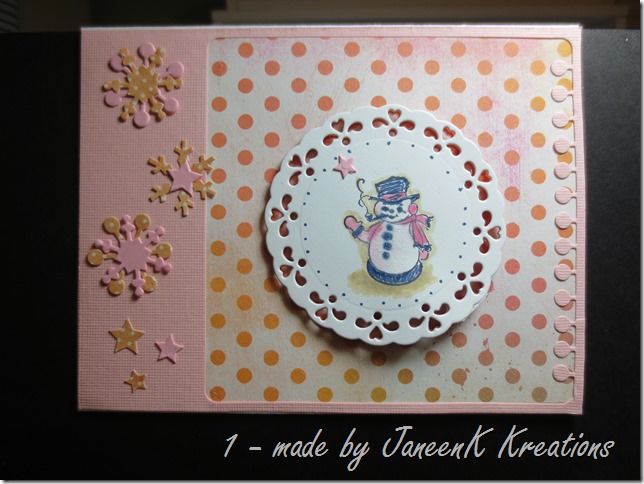
1.  I used Top Dog Die doily die and an old Sizzix snowflake die that I cut out of two different papers.  What sparked this card was the negative portion that was left from My Favorite Things Journal  dies.  I just couldn’t let that interesting piece go in the garbage.  Surprised smile

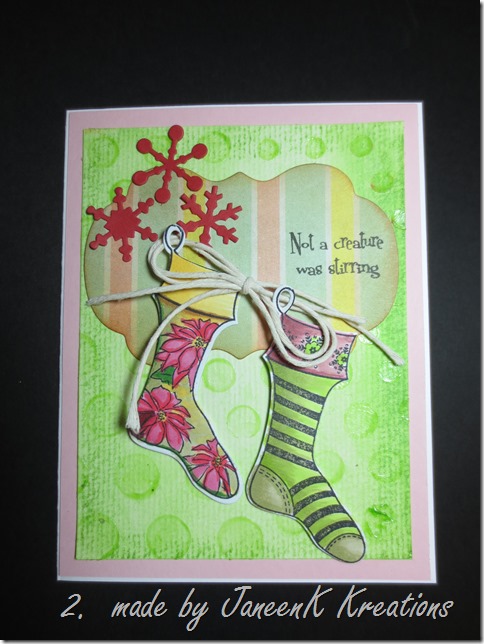
2.IMG_3074IMG_3081   More Prickley Pear and more Sizzix.  that snowflake die gets a work out at this time of the year.  I tried some mixed media on this one.  A bit of translucent paste spread over a My Favorite things stencil and gelato added to the paste before spreading.  Practicing my figure eight bows to add a nice touch. IMG_3079

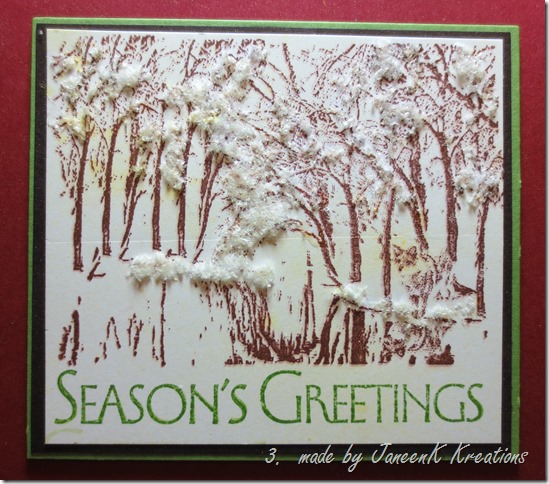
3. This one is a Mark’s Finest Papers image that I have wanted to use for a long time.  Stamped in brown and added a bit of stippling of Summer Sun ink across to give the idea of a bit of sun peeking through the woods and to highlight the fox a bit, otherwise, he got kind of lost.  A bit of flower soft snow on the trees and we have a winter card. IMG_3083

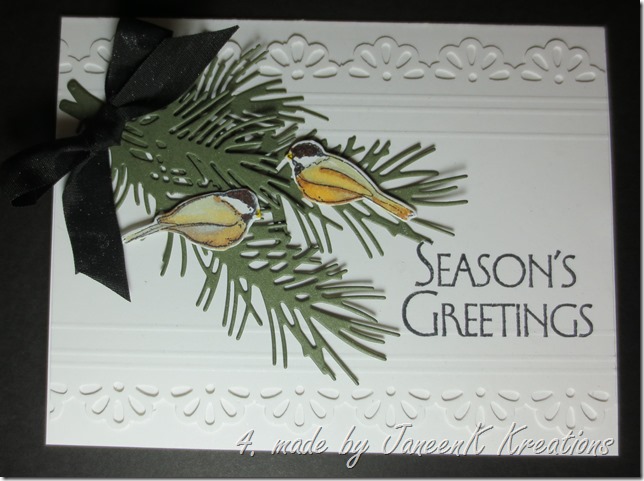
4. We made a card similar to this at the vendor show I went to a couple of weeks back.  I like the broader overlay and added extra scoring lines.  I changed the greeting also.  Made my own smooch spray with some radiant liquid pearls and alcohol in a spray bottle.  I love the nice shimmer it put on the paper.  you can’t see it much in the picture though.  These cute little chickadees and the pine bough die cuts are from Impression Obsession.  The edges are punched with a paper punch.

Cute Sketch Card

heathers sketch 2The Simon Says folks put up this cute sketch and the challenge is to make a card from the sketch. I really had fun with this sketch and it is going into my favorites.  it was simple yet has lots of visual appeal.  Here’s my card.  Using the Sentiments Stamp and the Banner Die both from Simon Says.

IMG_3076

Friday, November 22, 2013

ahhhh Stamping

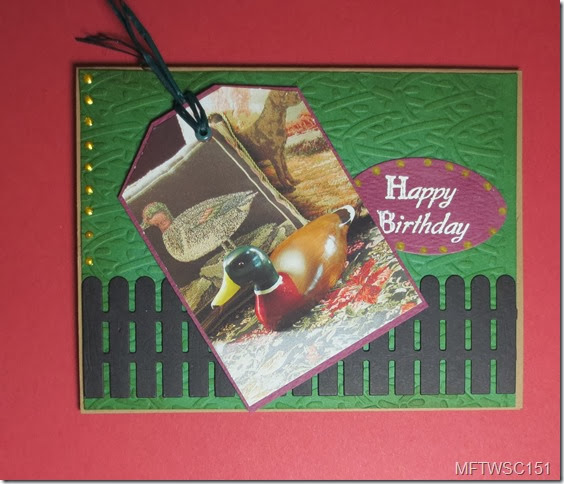
It’s just so relaxing to create and get inky.  Here are a couple of cards made for some teenagers in our area.  Man, all these kids are growing up, it seems their parents were just teenagers.  Their parents used to babysit our children and the one young man is the same age as our son and he has an 18 year old already.  Oh My, I am not ready for this.  This first one fits the MFT Sketch Challenge for the week.  I love the MFT sketches. This card uses the western fence die and the oval stax die.  The tag is a purchased  gem from long ago.  I still have a couple of them left.

IMG_3073

100MEDIA$IMAG0668

100MEDIA$IMAG0667

Thursday, November 21, 2013

Mysterious

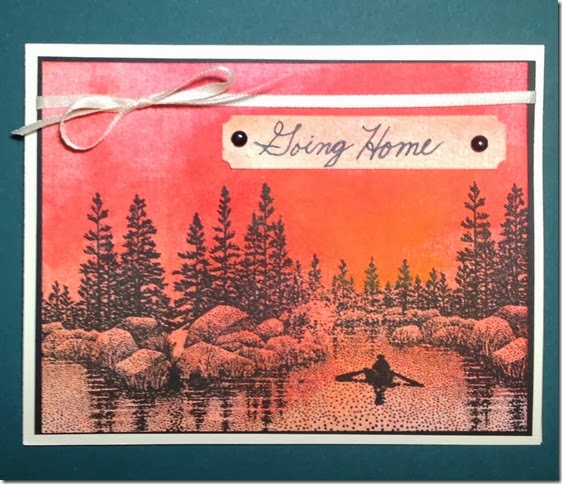
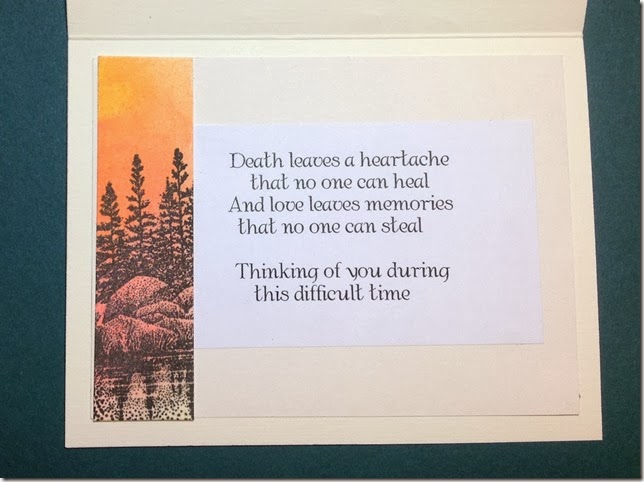
Simon Says Monday challenge is It’s Mysterious.  To be interpreted how we would like.  Death is mysterious and I am entering this Sympathy card for that challenge.  The mystery is what did I add to the card before mailing it?  Well, I can’t show you b/c I neglected to take a picture of it before mailing.  The answer:  a little piece of royal purple ribbon to the bow and it just set everything off nicely.  I just tied a piece right over the knot of the cream colored bow. 

IMG_2434IMG_2435

Monday, November 18, 2013

Simple Thanks

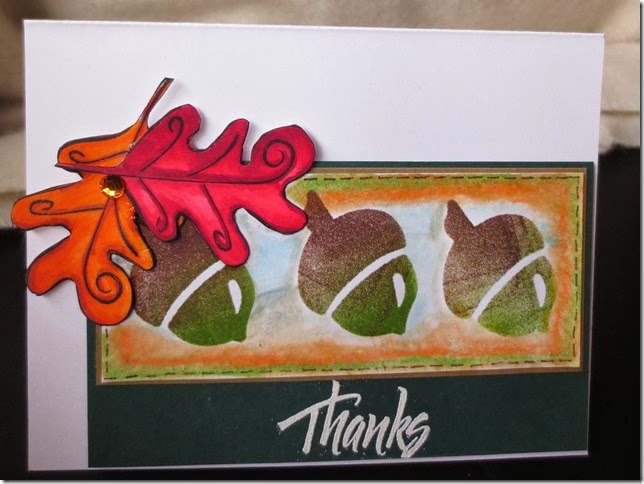
Made a card for Simon Says Wednesday Challenge.  It should be simple and say Thanks.  This was my first real attempt at dabbling with gelatos.  I went in and played a bit with some different techniques with them.  this was outlined with two colors and then blended together, then a touch of watered down gelato for the bluish background.  I was playing with copics too and colored the leaves and cut them out.  The Hero Arts Thanks is from an old set way back in 1997 and I only used this part of the full sentiment.  Love to stretch my stamps that way.

IMG_3069

Thursday, November 14, 2013

first time with canvas

I got these very cute canvas pieces at Hobby Lobby for really reduced.  The challenge at Simon Says MondayIMG_3044 this week is use ink!! I stamped on the canvas and then sprayed it with home made smooch.  Ink, plus pearls and alcohol.  Love the look.  I colored the lines in with SU markers and added the bird. For the background I ran a brayer over the smooth side of an embossing folder and ran it through the Big Shot.  I kind of like how it turned out.

Sunday, November 3, 2013

prickley pear rocks

It was so exciting and fun to attend the vendor stamping show on Saturday in Weston at Dale’s Bowling establishment.  What fun to see so many vendors and so many stampers.  I had a goal to make sure to visit three places for sure.  The Stamp Shoppe, Door County Rubber Stamps and the Prickley Pear booths.  I was not disappointed in any of them.  I did several make and takes which was fun and of course I had to purchase some Prickley Pear stamps and dies. Mary, the owner and designer is just the nicest person EVER!

Here is my first creation with my new items.  This is for the Prickley Pear Sketch Challenge for the Month of November 2013.

I just got myself a few more gelatos and I wanted to try some mixed media with this sketch.  IMG_2366  I used a stencil to make the banner with gelatos and then used transparent paste over the stencil to bring out the colors.  I then cut the banner into three parts to adhere to the sketch.  The little image and the lacy die and sentiment are all from Prickley Pear.  Before adhering the circle dies I used a bit of gelato mixed with water on my crafting mat and then flicked a stipple brush filled with the mixture, onto my card base.  such a soft little touch that gives some depth to the card.  I think I found my next favorite company.  It was fun to do make and takes with Michelle the senior design team member.  Check them out, they have the cutest images and reasonably priced. 

Wednesday, October 30, 2013

a four part challenge

Melissa, known as mollymoo, on our SplitCoastStampers flybaby is hostessing our October challenge .  She asked us to use these four things on a card or make four cards and use the different techniques.

        1. stitching! Hand stitch, sewing machine or faux! (Post #5)
        2. specialty! Not your usual cardstock. Post #6
        3. all mixed up! Let's dauble in mixed media!
        4. sparkle! Sequins, glitter, rhinestones!
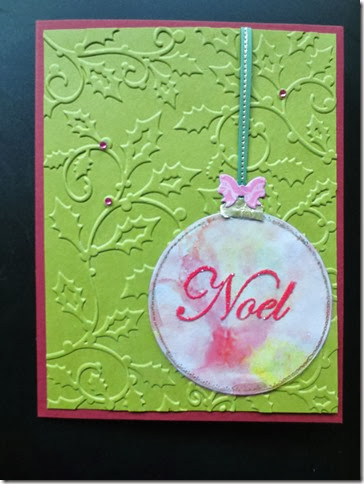
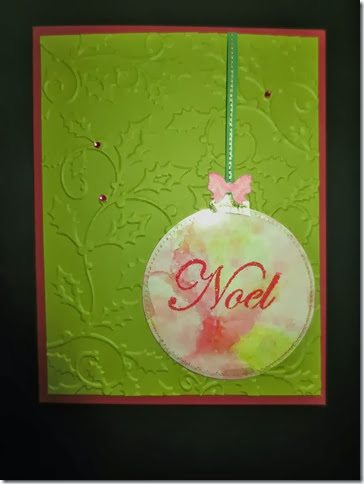
At first, my brain went into: OVERWHELM….then I thought, yikes if I do all that on one card it will be gaudy…  Well, here it is, one card; all the parts.

IMG_3005

IMG_3003

I am posting two pictures and maybe you can grasp the rich look this came out with.

  • my stitching is faux on the ribbon and around the ornament (love mft blueprints dies)
  • specialty cardstock is the acrylic ornament which is laid over tissue paper (both of which I never used before this week) and gold foil for the hanger part of the ornament
  • mixed media…I had these alcohol inks in my stash for years, I think we made a card similar to this at a class once and I bought the things and never made the cards.  which is why I think I had the acrylic sheets
  • rhinestones, ever so delicately placed in a triangle Smile  glitter using, Versamark and  heat and stick powder which is also mixed media

Did I enjoy making this?  YES, I did and it really didn’t take so long either. It is a specialty card though and not something I would want to mass produce. Smile

Happy Birthday Simon Says Way

Anything goes at Simon Says Stamp this week and their own products are the focus.  This card is made with the kit from May 2012 I believe.  Love love love all the little goodies that came in that kit.  I used The All Occasion Greetings for the sentiment and one of the mini hearts from the mini hearts die.  Both from SSS.  I really love the different look of this card. THANKS Simon Says for making such quality products.

This is going to be handed to a young girl that turns the ripe old age of 19 today.

IMG_3015

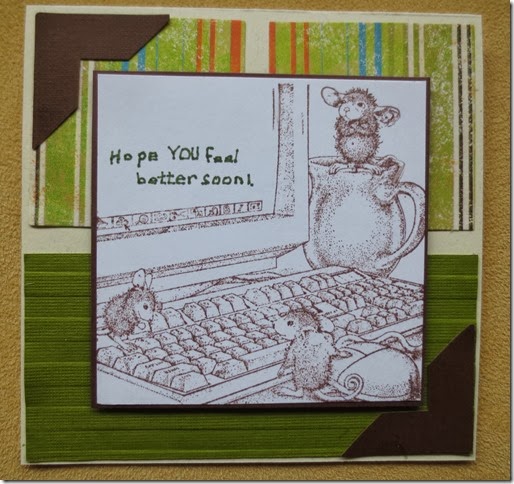
house mouse techy message

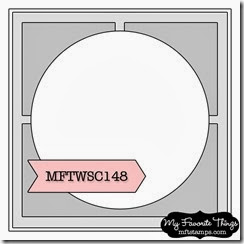
Love the house mouse stamps.  Most of them I got at rummage sales a few a purchased from The Stamp Shoppe years ago.  I forgot I even had this one but it made a perfect card for the MFTWSC148 sketch challenge.  I used the hand lettered saying on the computer in place of the little banner tag in the sketch.

Here is the sketch and my version of it. –My word, I need five cards for today.  This is card number 3 finished.  onward!

MFTWSC148 IMG_3008

Saturday, October 26, 2013

So very sad

Sad to see the Sweet Stop is having their last Saturday blog challenge.  Of course I had to use Coco Mouse in this situation.  He always makes me smile.  Here is my offering for the last Sweet Stop #234  I will miss you.  It’s been fun and I even won a couple of times.  Thank you so much Sweet N Sassy.

IMG_3005

Spooky

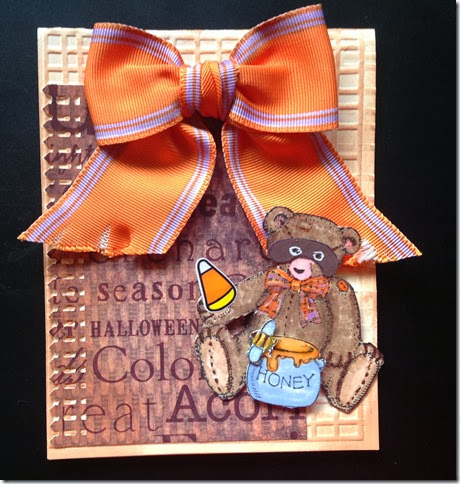
Spooky is the Monday challenge at Simon Says.  I made this cute little bear and then made him Spooky by attaching a mask.  I don’t really like scary things so I kind of had to think about this challenge.

IMG_2336

Happy Halloween

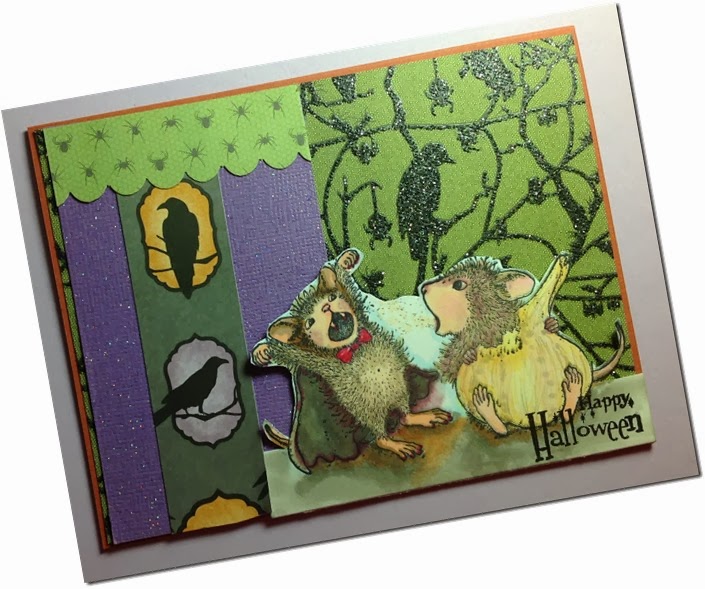
Simon Says is having a Halloween Challenge for their Wednesday challenge blog.  While I don’t get that into Halloween I have an adult daughter that still loves everything about halloween from those ugly ravens to witches.  I thought she would have fun opening this card with the very cute House Mouse mice.  They are the only cute thing about Halloween as far as I am concerned.   well all the little kiddos too!

IMG_2347


The back ground papers are Martha Stewart and the sentiment is from a retired set.